You can know more about editing the articles in the wiki by reading guidelines.
Difference between revisions of "Depot"
m |
(walkthrough) |
||
| (23 intermediate revisions by 4 users not shown) | |||
| Line 1: | Line 1: | ||
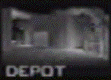
| − | [[Image:Depot.png| | + | '''Depot''' (Part iv of Mission 6: St. Petersburg) is the thirteenth level in [[GoldenEye 007]]. |
| + | |||
| + | {|class="wikitable" style="float:right;" | ||
| + | !colspan="3"|Depot | ||
| + | |- | ||
| + | | colspan="3" style="text-align: center;"| [[Image:Depot.png|150px]] | ||
| + | |- | ||
| + | !colspan="3"|World Records | ||
| + | |- | ||
| + | |Difficulty || Time || First achieved by | ||
| + | |- | ||
| + | |Agent || [https://www.youtube.com/watch?v=iwsJ4o6YK4U 0:23] || Philip Bezgoubov on 2015-04-28 | ||
| + | |- | ||
| + | |Secret Agent || [https://www.youtube.com/watch?v=16GsNi-wNl4 0:39] || Ryan W. on 2015-06-11 | ||
| + | |- | ||
| + | |00 Agent || [https://www.youtube.com/watch?v=yhl7Rhd8qJo 0:45] || Gus Riolo on 2020-02-21 | ||
| + | |- | ||
| + | |LTK || [https://www.youtube.com/watch?v=f2GDh_fOfBA 0:57] || Rayan Isran on 2019-03-30 | ||
| + | |- | ||
| + | |DLTK || [https://www.youtube.com/watch?v=dx5ttbAnhEo 1:21] || Kyle Wiebenga on 2019-12-01 | ||
| + | |} | ||
| + | |||
| + | == Objectives == | ||
| + | |||
| + | === Agent === | ||
| + | |||
| + | ; a. Locate Trevelyan's train | ||
| + | |||
| + | === Secret Agent === | ||
| − | ' | + | ; a. Destroy computer network |
| + | ; b. Obtain safe key | ||
| + | ; c. Recover helicopter blueprints | ||
| + | ; d. Locate Trevelyan's train | ||
| + | |||
| + | === 00 Agent === | ||
| + | |||
| + | ; a. Destroy illegal arms cache | ||
| + | ; b. Destroy computer network | ||
| + | ; c. Obtain safe key | ||
| + | ; d. Recover helicopter blueprints | ||
| + | ; e. Locate Trevelyan's train | ||
| − | == | + | == Facts == |
| − | + | === Guard Spawns === | |
| − | ' | + | There are 7 spawn guards in total<ref>{{cite web | url=https://forums.the-elite.net/index.php?topic=18518.msg398709#msg398709|title=the-elite facts topic post on Depot guard spawns|access-date=July 16, 2021}}</ref>. Initially, they all wait 20 seconds, starting when the first cinema appears. After 20 seconds have passed, the game checks if Bond is within a "safe area" (see below), if so, the game just waits for Bond to leave that area. Once Bond has touched a non-safe area, the guard's timers are reset and the game now waits X seconds, the value of X being individually set for each guard (see below). Once this timer runs out, the game checks if the guard is dead, and if so, he spawns. Otherwise the game goes back to check if Bond is within a safe area again. Where he will spawn depends on which out of 10 "special areas" Bond last was in (see below). Once a guard has spawned, the script returns to checking if Bond is in a safe area (so the initial 20 seconds only happen the first time around). This whole process is easier visualized through 5 steps: |
| − | + | 1: Wait 20 seconds | |
| + | 2. Wait for Bond to not be in a safe area | ||
| + | 3. Wait X seconds | ||
| + | 4. If guard is currently alive (Dead = Completely faded out), go back to step 2. | ||
| + | 5. Spawn guard, then go back to step 2. | ||
| − | + | The weapons/health/armor for the spawned guards are random according to these probabilities: | |
| − | + | 31.65% | |
| + | Weapon = 1x D5k Deutche | ||
| + | Health = 40 | ||
| + | Armor = 0 | ||
| − | + | 31.25% | |
| + | Weapon = 1x D5k Deutche | ||
| + | Health = 40 | ||
| + | Armor = 10 | ||
| − | + | 37.1% | |
| + | Weapon = 2x D5k Deutche | ||
| + | Health = 40 | ||
| + | Armor = 20 | ||
| − | + | The individual timers for each guard are the following: | |
| − | |||
| − | = | + | {| class="wikitable" |
| + | !Guard||Time (X) | ||
| + | |- | ||
| + | |#1||20 seconds | ||
| + | |- | ||
| + | |#2||25 seconds | ||
| + | |- | ||
| + | |#3||30 seconds | ||
| + | |- | ||
| + | |#4||35 seconds | ||
| + | |- | ||
| + | |#5||60 seconds | ||
| + | |- | ||
| + | |#6||120 seconds | ||
| + | |- | ||
| + | |#7||150 seconds | ||
| + | |} | ||
| − | + | :<span style="background-color: #000000; color: #00ff00; padding: 4px;">Green = Safe area</span> | |
| + | :<span style="background-color: #000000; color: #0000ff; padding: 4px;">Blue = Special Area #1</span> | ||
| + | :<span style="background-color: #000000; color: #ff0054; padding: 4px;">Magenta = Special Area #2</span> | ||
| + | :<span style="background-color: #000000; color: #8c00ff; padding: 4px;">Purple = Special Area #3</span> | ||
| + | :<span style="background-color: #000000; color: #603913; padding: 4px;">Brown = Special Area #4</span> | ||
| + | :<span style="background-color: #000000; color: #00ffff; padding: 4px;">Cyan = Special Area #5</span> | ||
| + | :<span style="background-color: #000000; color: #ffff00; padding: 4px;">Yellow= Special Area #6</span> | ||
| + | :<span style="background-color: #000000; color: #ffffff; padding: 4px;">White= Special Area #7</span> | ||
| + | :<span style="background-color: #000000; color: #ff7878; padding: 4px;">Pink= Special Area #8</span> | ||
| + | :<span style="background-color: #000000; color: #ff8c00; padding: 4px;">Orange= Special Area #9</span> | ||
| + | :<span style="background-color: #000000; color: #ff0000; padding: 4px;">Red= Special Area #10</span> | ||
| − | + | [[Image:goldeneye_007_depot_guard_spawns_1_of_5.png|400px]] | |
| + | [[Image:goldeneye_007_depot_guard_spawns_2_of_5.png|400px]] | ||
| + | [[Image:goldeneye_007_depot_guard_spawns_3_of_5.png|400px]] | ||
| + | [[Image:goldeneye_007_depot_guard_spawns_4_of_5.png|400px]] | ||
| + | [[Image:goldeneye_007_depot_guard_spawns_5_of_5.png|400px]] | ||
| − | + | Note that special area #8 is also a safe area, hence the outlining of pink rather than a highlight. If Bond is within a non-highlighted area, that means guards will spawn according to the last special area Bond was in. | |
| − | + | So if Bond stands in the very beginning (the blue highlighted area) for 40 seconds (20 + 20) then the first guard will spawn at the blue dot with a blue "#1" next to it. If he instead ran quickly to a green area before the first 20 seconds had passed, no guards will spawns until Bond has left that area. | |
| − | + | The game doesn't always recognize that Bond entered the pink area (most likely because it's also a safe area, and script wise, that usually takes priority). So the game often uses white spawns instead. | |
| − | + | === Guard Scripts === | |
| − | + | There's a line of code that's very useful to us<ref>{{cite web | url=https://forums.the-elite.net/index.php?topic=18518.msg398744#msg398744|title=the-elite facts topic post on Depot guard scripts|access-date=July 16, 2021}}</ref>. | |
| − | + | Long story short: | |
| + | 1. After a guard spawns, he will run/jog until he's within a certain distance of Bond. | ||
| + | 2. If Bond is within a safe area, the script will jump into a second script, that tells the guard to jog until he's even closer to Bond. | ||
| + | 3. Once he's done jogging, a third script is entered. This is the one where the guard starts kneeling, which should be very familiar. | ||
| − | + | The interresting part is that there's only 2 ways the guard can get out of the third script (where he is unable to move anywhere), either the guard notices that Bond fired a bullet, or Bond is more than 500 units of distance away. 500 units is quite alot, if you draw a circle with 500 units as a radius, it will cover most of the level. So in Illu's run, the guards were positioned in the large warehouse, and the 500 unit radius easily covers the mainframe room from there, which prevents the guards from following him. | |
| − | + | If you wait even longer, until all 7 guards have reached this area, you might be able to avoid killing any guards when leaving the mainframe area. | |
| − | + | == Stragegies == | |
| − | |||
| − | == | + | === Train Shot === |
| − | + | While running to the last building, turn and shoot at the train. When done correctly, the bullet travels through the end of the train instead of stopping like it would on most surfaces. If the bullet path is close enough to a guard inside, he will be alerted and then open the roller door. | |
| − | + | For an in depth guide, see the the [[Goldeneye_007_Tutorial:_Train_Shot|walkthrough]] page. | |
| − | + | [[Image:Goldeneye-depot-train shot turn.png|thumb|Visual queue for when to turn for the train shot. Note the right building is just touching the top of the screen.]] | |
| − | + | == Tutorials == | |
| − | + | * Depot Warp [https://www.youtube.com/watch?v=fJABofdxL4E by Grav] | |
| − | + | === Agent === | |
| − | + | * [[Goldeneye 007 Tutorial: Depot Agent|Depot Agent]] | |
| − | + | * [https://www.youtube.com/watch?v=bn0ZLp4Tp0Q video tutorial target 0:25 by Goose] | |
| − | + | === Secret Agent === | |
| − | * | + | * [[Goldeneye 007 Tutorial: Depot Secret Agent|Depot Secret Agent]] |
| − | |||
| − | == | + | === 00 Agent === |
| − | + | * [[Goldeneye 007 Tutorial: Depot 00 Agent|Depot 00 Agent]] | |
| − | + | === LTK === | |
| − | + | * [[Goldeneye 007 Tutorial: Depot LTK|Depot LTK]] | |
| − | + | * Tutorial Video: [https://videos.huzip.net/tutorials/goldeneye/ltk-dltk/Adam-Bozon/annotated/Depot%20LTK%20Tutorial.html - Adam Bozon - Depot LTK Tutorial (turn captions on)] | |
| + | * Tutorial Video: [https://videos.huzip.net/tutorials/perfect-dark/ltk-dltk/Eric-Liikala/annotated/Depot%20LTK%20Tutorial.html - Icy - Depot LTK Tutorial (turn captions on)] | ||
| − | + | === DLTK === | |
| − | + | * [[Goldeneye 007 Tutorial: Depot DLTK|Depot DLTK]] | |
| − | * | + | * Tutorial Video: [https://videos.huzip.net/tutorials/goldeneye/ltk-dltk/Adam-Bozon/annotated/Depot%20DLTK%20Tutorial.html - Adam Bozon - Depot DLTK Tutorial (turn captions on)] |
== External Links == | == External Links == | ||
| − | * [ | + | * [https://rankings.the-elite.net/goldeneye/stage/depot Depot World Rankings] |
| − | * [ | + | * [https://rankings.the-elite.net/goldeneye/ltk/stage/depot Depot LTK/DLTK Rankings] |
* [http://thengamer.com/GE/13-Depot/ Depot Videos] | * [http://thengamer.com/GE/13-Depot/ Depot Videos] | ||
| + | |||
| + | ==References== | ||
| + | {{Reflist}} | ||
[[Category:GE Strats]] | [[Category:GE Strats]] | ||
| + | [[Category:GoldenEye 007]] | ||
{{Template:GoldenEye 007 solo missions}} | {{Template:GoldenEye 007 solo missions}} | ||
Latest revision as of 14:09, 15 January 2022
Depot (Part iv of Mission 6: St. Petersburg) is the thirteenth level in GoldenEye 007.
| Depot | ||
|---|---|---|

| ||
| World Records | ||
| Difficulty | Time | First achieved by |
| Agent | 0:23 | Philip Bezgoubov on 2015-04-28 |
| Secret Agent | 0:39 | Ryan W. on 2015-06-11 |
| 00 Agent | 0:45 | Gus Riolo on 2020-02-21 |
| LTK | 0:57 | Rayan Isran on 2019-03-30 |
| DLTK | 1:21 | Kyle Wiebenga on 2019-12-01 |
Objectives
Agent
- a. Locate Trevelyan's train
Secret Agent
- a. Destroy computer network
- b. Obtain safe key
- c. Recover helicopter blueprints
- d. Locate Trevelyan's train
00 Agent
- a. Destroy illegal arms cache
- b. Destroy computer network
- c. Obtain safe key
- d. Recover helicopter blueprints
- e. Locate Trevelyan's train
Facts
Guard Spawns
There are 7 spawn guards in total[1]. Initially, they all wait 20 seconds, starting when the first cinema appears. After 20 seconds have passed, the game checks if Bond is within a "safe area" (see below), if so, the game just waits for Bond to leave that area. Once Bond has touched a non-safe area, the guard's timers are reset and the game now waits X seconds, the value of X being individually set for each guard (see below). Once this timer runs out, the game checks if the guard is dead, and if so, he spawns. Otherwise the game goes back to check if Bond is within a safe area again. Where he will spawn depends on which out of 10 "special areas" Bond last was in (see below). Once a guard has spawned, the script returns to checking if Bond is in a safe area (so the initial 20 seconds only happen the first time around). This whole process is easier visualized through 5 steps:
1: Wait 20 seconds 2. Wait for Bond to not be in a safe area 3. Wait X seconds 4. If guard is currently alive (Dead = Completely faded out), go back to step 2. 5. Spawn guard, then go back to step 2.
The weapons/health/armor for the spawned guards are random according to these probabilities:
31.65% Weapon = 1x D5k Deutche Health = 40 Armor = 0
31.25% Weapon = 1x D5k Deutche Health = 40 Armor = 10
37.1% Weapon = 2x D5k Deutche Health = 40 Armor = 20
The individual timers for each guard are the following:
| Guard | Time (X) |
|---|---|
| #1 | 20 seconds |
| #2 | 25 seconds |
| #3 | 30 seconds |
| #4 | 35 seconds |
| #5 | 60 seconds |
| #6 | 120 seconds |
| #7 | 150 seconds |
- Green = Safe area
- Blue = Special Area #1
- Magenta = Special Area #2
- Purple = Special Area #3
- Brown = Special Area #4
- Cyan = Special Area #5
- Yellow= Special Area #6
- White= Special Area #7
- Pink= Special Area #8
- Orange= Special Area #9
- Red= Special Area #10


Note that special area #8 is also a safe area, hence the outlining of pink rather than a highlight. If Bond is within a non-highlighted area, that means guards will spawn according to the last special area Bond was in.
So if Bond stands in the very beginning (the blue highlighted area) for 40 seconds (20 + 20) then the first guard will spawn at the blue dot with a blue "#1" next to it. If he instead ran quickly to a green area before the first 20 seconds had passed, no guards will spawns until Bond has left that area.
The game doesn't always recognize that Bond entered the pink area (most likely because it's also a safe area, and script wise, that usually takes priority). So the game often uses white spawns instead.
Guard Scripts
There's a line of code that's very useful to us[2].
Long story short: 1. After a guard spawns, he will run/jog until he's within a certain distance of Bond. 2. If Bond is within a safe area, the script will jump into a second script, that tells the guard to jog until he's even closer to Bond. 3. Once he's done jogging, a third script is entered. This is the one where the guard starts kneeling, which should be very familiar.
The interresting part is that there's only 2 ways the guard can get out of the third script (where he is unable to move anywhere), either the guard notices that Bond fired a bullet, or Bond is more than 500 units of distance away. 500 units is quite alot, if you draw a circle with 500 units as a radius, it will cover most of the level. So in Illu's run, the guards were positioned in the large warehouse, and the 500 unit radius easily covers the mainframe room from there, which prevents the guards from following him.
If you wait even longer, until all 7 guards have reached this area, you might be able to avoid killing any guards when leaving the mainframe area.
Stragegies
Train Shot
While running to the last building, turn and shoot at the train. When done correctly, the bullet travels through the end of the train instead of stopping like it would on most surfaces. If the bullet path is close enough to a guard inside, he will be alerted and then open the roller door.
For an in depth guide, see the the walkthrough page.

Tutorials
- Depot Warp by Grav
Agent
Secret Agent
00 Agent
LTK
- Tutorial Video: - Adam Bozon - Depot LTK Tutorial (turn captions on)
- Tutorial Video: - Icy - Depot LTK Tutorial (turn captions on)
DLTK
- Tutorial Video: - Adam Bozon - Depot DLTK Tutorial (turn captions on)
External Links
References
- ↑ "the-elite facts topic post on Depot guard spawns". Retrieved July 16, 2021.
- ↑ "the-elite facts topic post on Depot guard scripts". Retrieved July 16, 2021.
| GoldenEye 007 solo missions |
|---|