You can know more about editing the articles in the wiki by reading guidelines.
Frigate agent hostages movement
Context
This article concerns the loading and unloading of the two 'agent hostages' on Frigate. Unloaded movement in general is described on its own page - this can be seen as a particular application of the information there.
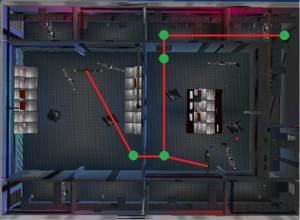
As described on the main unloaded movement page, all intermediate points of the route will be on the navigation graph while the hostage is unloaded. For these agent hostages, travelling to the best escape point, the relevant part of the navigation graph that they will use is shown on the right. Pads are in green with the hostages' segments in red.
The easiest way to ensure that the hostages are as fast as possible is to keep them unloaded the entire time.
Loading causes
In this specific scenario, a few different things can cause one of the hostages to load.
Loading the 1st room
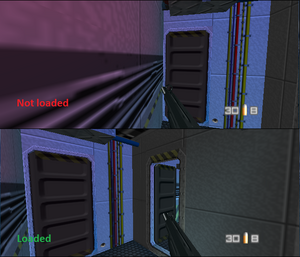
The first, and most obvious, of these is loading the room that the 1st hostage starts in. This is easily done while backing up from the bug throw. Once the portal inside the doorway comes onto the screen the room inside will load. There are a few potential solutions to this:
- have this happen late enough that the hostage has already left the room - i.e. get a good death animation
- never look back at the door, which is done in the 2.3 strat using backstrafe
- close the door. This works well here on 00A, but on agent it stops the extra guard in the 1st room from seeing us. His unloaded movement will put him in the hostage's path, and cause him to load at the end of his first segment. Without getting too stuck on the chair, he'll still lose a good 2 seconds.
Blocking the 1st hostage
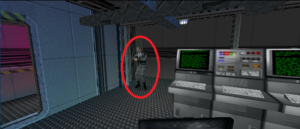
Secondly, another character can block the 1st hostage. This can be the other hostage, but the other guard in the 2nd room is particularly troublesome. He starts moving towards Bond when he sees us shoot the 2nd taker. The culprit is shown on the right. The timing is very unfortunate, and this guard will likely be at the end of the 1st hostage's initial segment when he completes it. Again this reloads the hostage, and loses at least 2s.
With the standard strat there is no practical way to keep this troublesome guard out of the way. He is tightly tied to when you kill the 2nd taker, and the speed that he travels at is also out of your control. He attempts to shortcut across the room through the consoles, and depending on how he spins and when he unloads, he can take a better or worse route and be travelling at 80% or full speed. You need him to travel at full speed, and have taken a good path, in order for him to get out of the way of the hostage in time.


